 Save
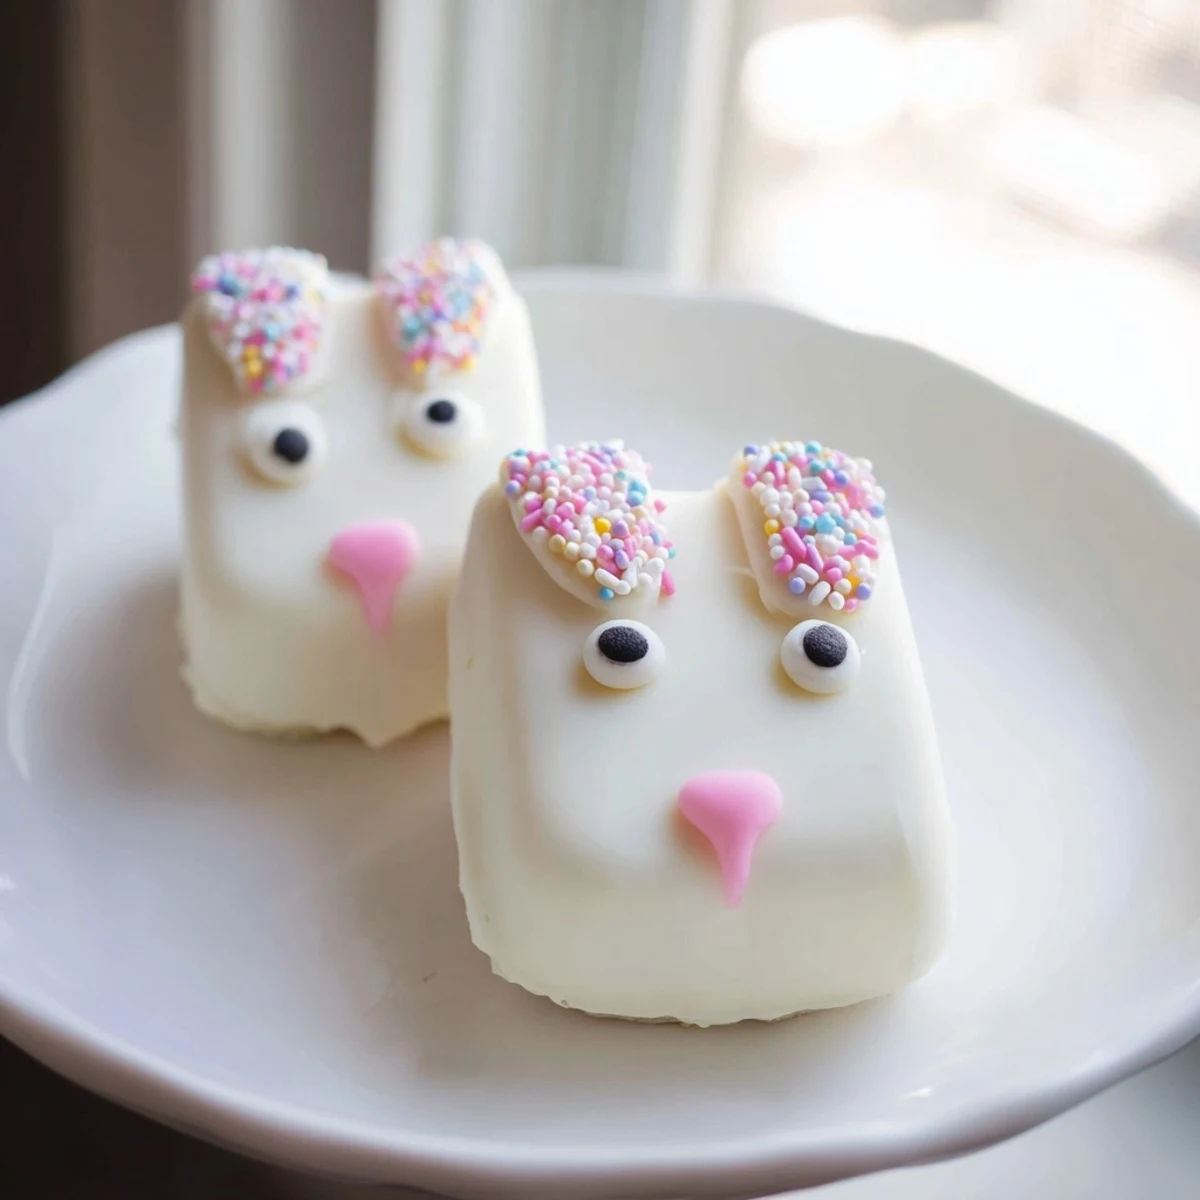
Save These adorable bunny-shaped treats combine moist vanilla cake crumbs with creamy white chocolate coating for the ultimate Easter dessert. The cake mixture blends vanilla crumbs with cream cheese, butter, and powdered sugar to create a perfectly fudgy center that holds its shape when dipped.
Decorating is half the fun—add candy eyes, sprinkle noses, or fondant ears to bring each bunny to life. The white chocolate shell creates a smooth canvas for colorful embellishments, making these treats as delightful to make as they are to eat.
The kitchen smelled like vanilla and cream cheese while my daughter kept peering over the counter, asking if the bunny faces were ready yet. We had this grand plan to make something special for Easter brunch, something that would make the cousins' eyes light up the moment they walked in. These cakesicles became that perfect combination of whimsical and delicious, turning simple cake scraps into something magical.
Last year we set up a little decorating station with bowls of sprinkles and candy eyes, and honestly the adults got just as into it as the children. My sister made a bunny with pink ears and blue eyes that looked surprisingly artistic for someone who claims she cannot draw a straight line. These treats have become the thing everyone asks about as soon as Easter starts approaching.
Ingredients
- Vanilla cake crumbs: I have used everything from leftover birthday cake to store bought cupcakes, just crush them until you have fine crumbs
- Cream cheese: Make sure this is completely soft or you will end up with lumps in your mixture
- Unsalted butter: Room temperature butter helps bind everything together without making the mixture too greasy
- Powdered sugar: This sweetens the filling slightly while helping it firm up properly
- Vanilla extract: Pure vanilla makes such a difference here compared to imitation
- White chocolate: Candy melts work great but good quality white chocolate tastes noticeably better
- Edible gel food coloring: Gel coloring works better than liquid for not seizing the chocolate
- Cakesicle sticks: You can find these at craft stores or online baking supply shops
- Sprinkles and decorations: Let your imagination run wild with candy eyes, fondant ears, or colorful sprinkles
Instructions
- Mix the cake base:
- Combine the cake crumbs, softened cream cheese, butter, powdered sugar, and vanilla in a medium bowl. Mix until everything comes together into a dough that holds its shape when you squeeze it.
- Shape the bunnies:
- Divide the mixture into eight equal portions and form each into a flattened oval shape that resembles a bunny face. Try to make them somewhat uniform so they bake evenly.
- Add the sticks:
- Gently insert a cakesicle stick into each shape, pressing carefully so the cake mixture secures around it. Place them on a parchment lined tray and refrigerate for at least 20 minutes until firm.
- Melt the chocolate:
- Put the white chocolate in a microwave safe bowl and heat in 30 second intervals, stirring between each burst. Stop when it is completely smooth and fluid.
- Coat the cakesicles:
- Dip each chilled cake pop into the melted chocolate, turning to coat completely. Gently tap the stick against the bowl edge to let excess chocolate drip off.
- Add the decorations:
- While the coating is still wet, immediately add candy eyes, sprinkles, or fondant ears so they stick properly. Work quickly because the chocolate sets fast.
- Set and serve:
- Let the cakesicles set completely at room temperature, or speed things up with 10 minutes in the refrigerator. Once firm, they are ready to serve and enjoy.
 Save
Save The best moment came when my usually picky nephew took a bite and his eyes went wide, immediately asking if we could make these for every holiday. Something about that combination of moist cake and crisp white chocolate coating just works perfectly together. Now they are the first thing everyone looks for on the dessert table.
Making Them Ahead
You can prepare the cake mixture and shape the bunnies up to two days in advance, just keep them tightly wrapped in the refrigerator. The dipping should happen the same day you plan to serve them for the freshest appearance and texture. I have learned the hard way that the coating can get sticky or dull if it sits too long.
Decoration Ideas
Beyond the classic bunny face, we have made carrots using orange colored white chocolate with green sprinkle tops. You could also do simple pastel colored eggs or even little chick faces with yellow coating. The nice thing about these is that they work with whatever Easter theme you have going on.
Serving Suggestions
These work beautifully displayed in a jar or vase filled with Easter grass, or simply lined up on a platter. I like to put them out about 15 minutes before serving so the chocolate coating is not too cold and hard.
- Consider making some without sticks for easier serving to younger children
- Have extra melted chocolate on hand for quick touch ups if any cracks form
- Set up a decorating station and let guests customize their own bunny
 Save
Save These bunny cakesicles have become such a beloved tradition in our house, and I hope they bring just as much joy to your Easter table. Happy baking and happy Easter.
Recipe FAQs
- → How long do cakesicles stay fresh?
-
Store your cakesicles in an airtight container in the refrigerator for up to 3 days. The white chocolate coating helps keep the cake center moist and fresh.
- → Can I make these ahead of time?
-
Absolutely! Prepare the cake shapes and insert sticks, then refrigerate overnight. Dip and decorate the next day when ready to serve.
- → What other cake flavors work well?
-
Chocolate cake creates a classic combination with white chocolate. Lemon, strawberry, or red velvet also pair beautifully with the sweet white coating.
- → Do I need a special mold?
-
No mold required! Simply shape the cake mixture into flattened ovals by hand. A mold helps with uniformity, but freehand shaping works perfectly for rustic bunny faces.
- → How do I prevent the chocolate from seizing?
-
Melt white chocolate in 30-second intervals, stirring thoroughly between each burst. Avoid getting any water in the chocolate, as even a few drops can cause seizing.
- → Can I use candy melts instead of real white chocolate?
-
Yes! Candy melts are actually easier to work with since they're designed for dipping and coating. They come in various colors and set up nicely at room temperature.