 Save
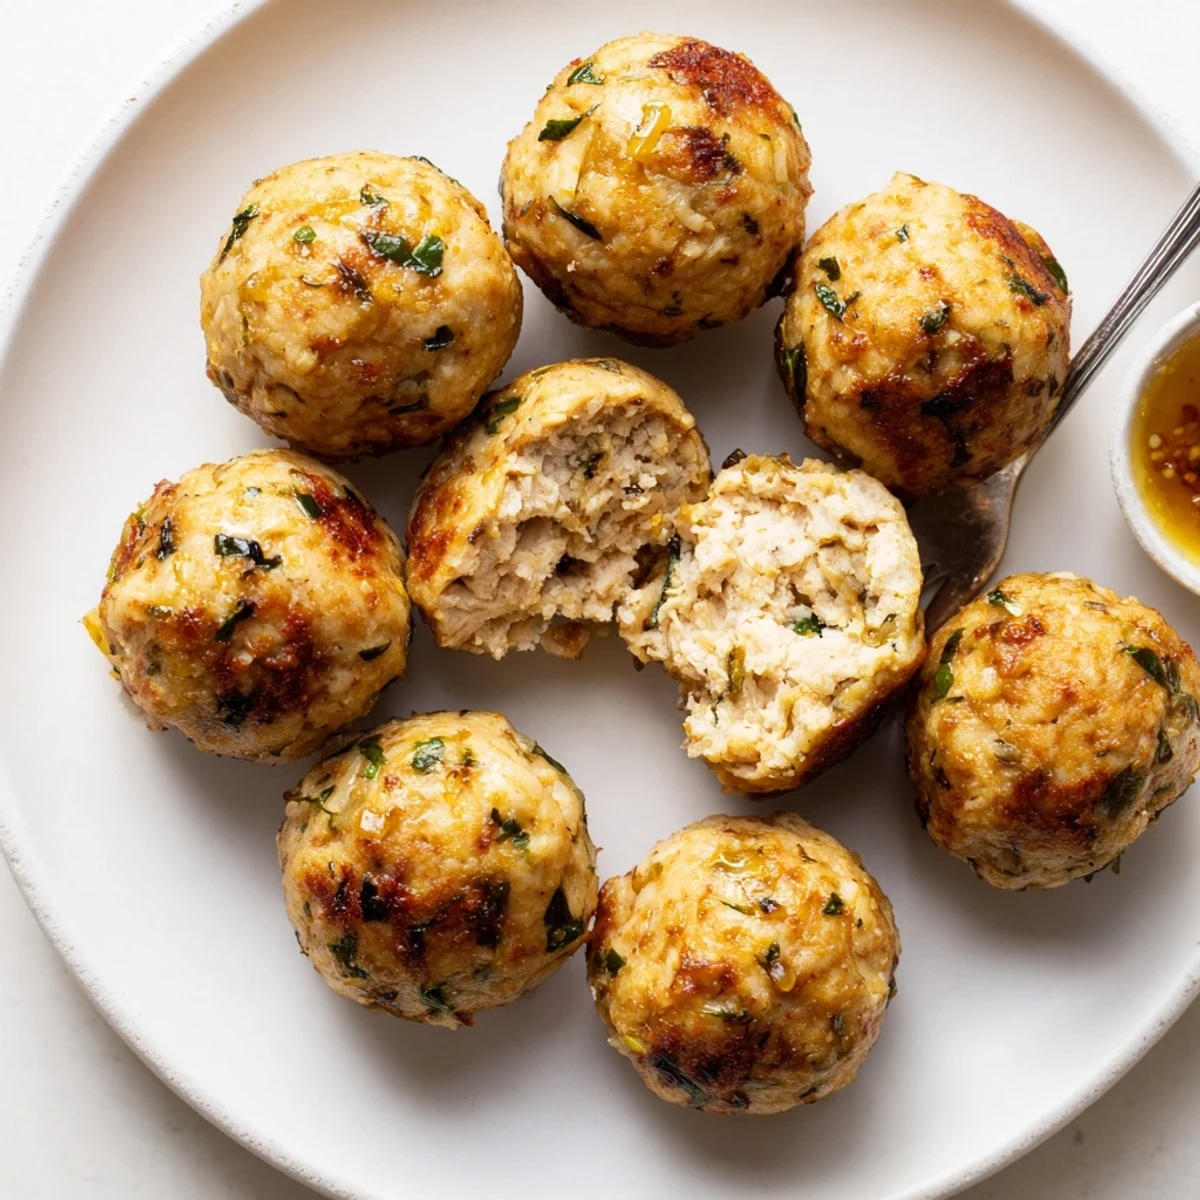
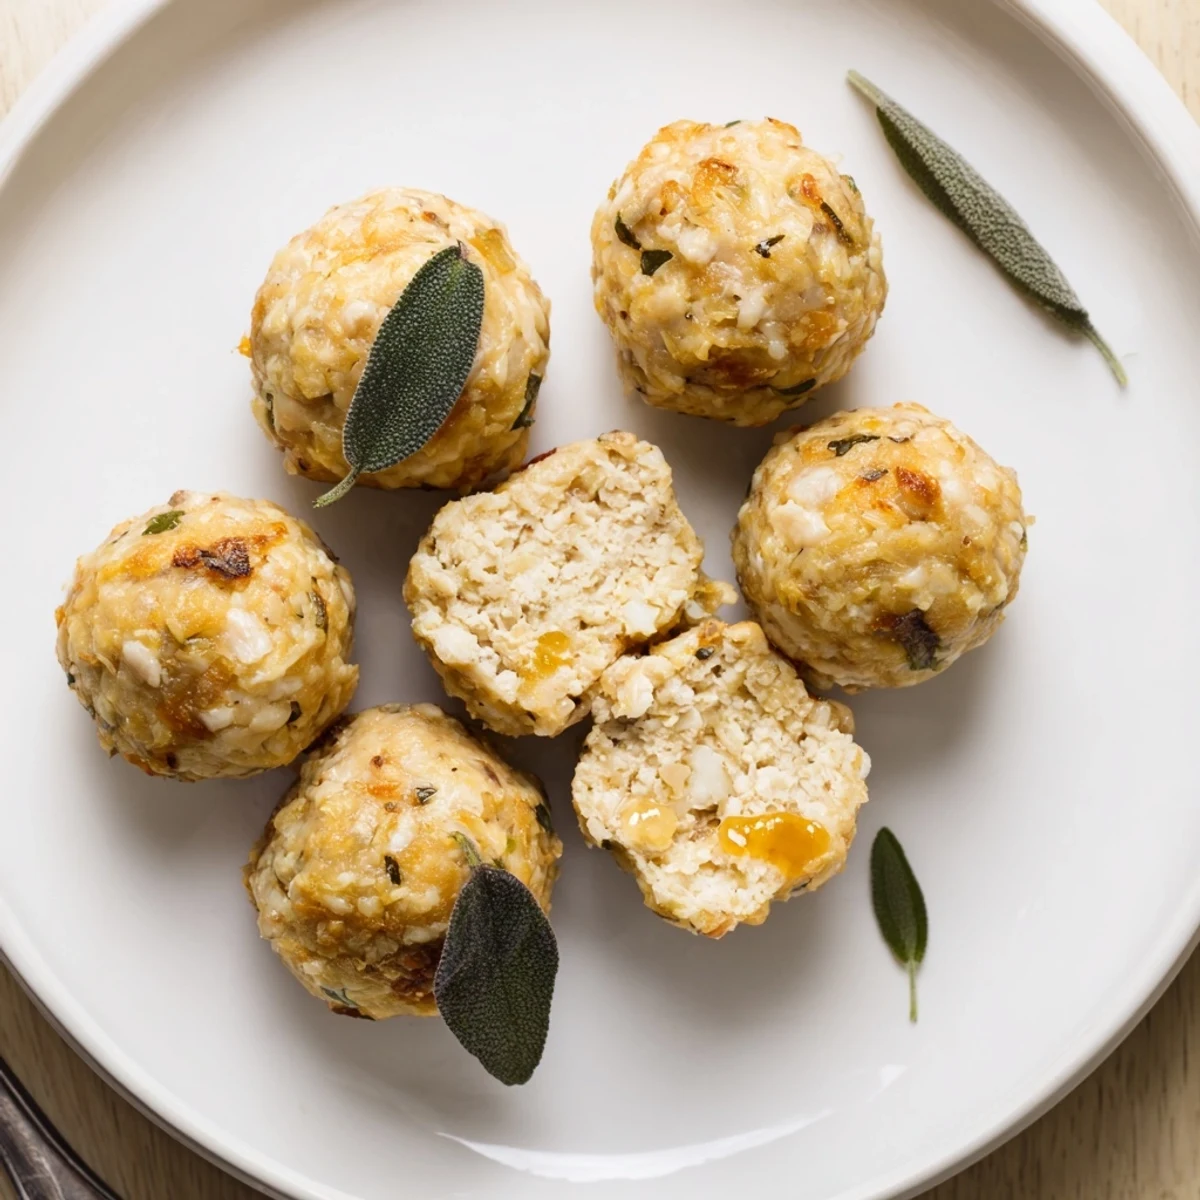
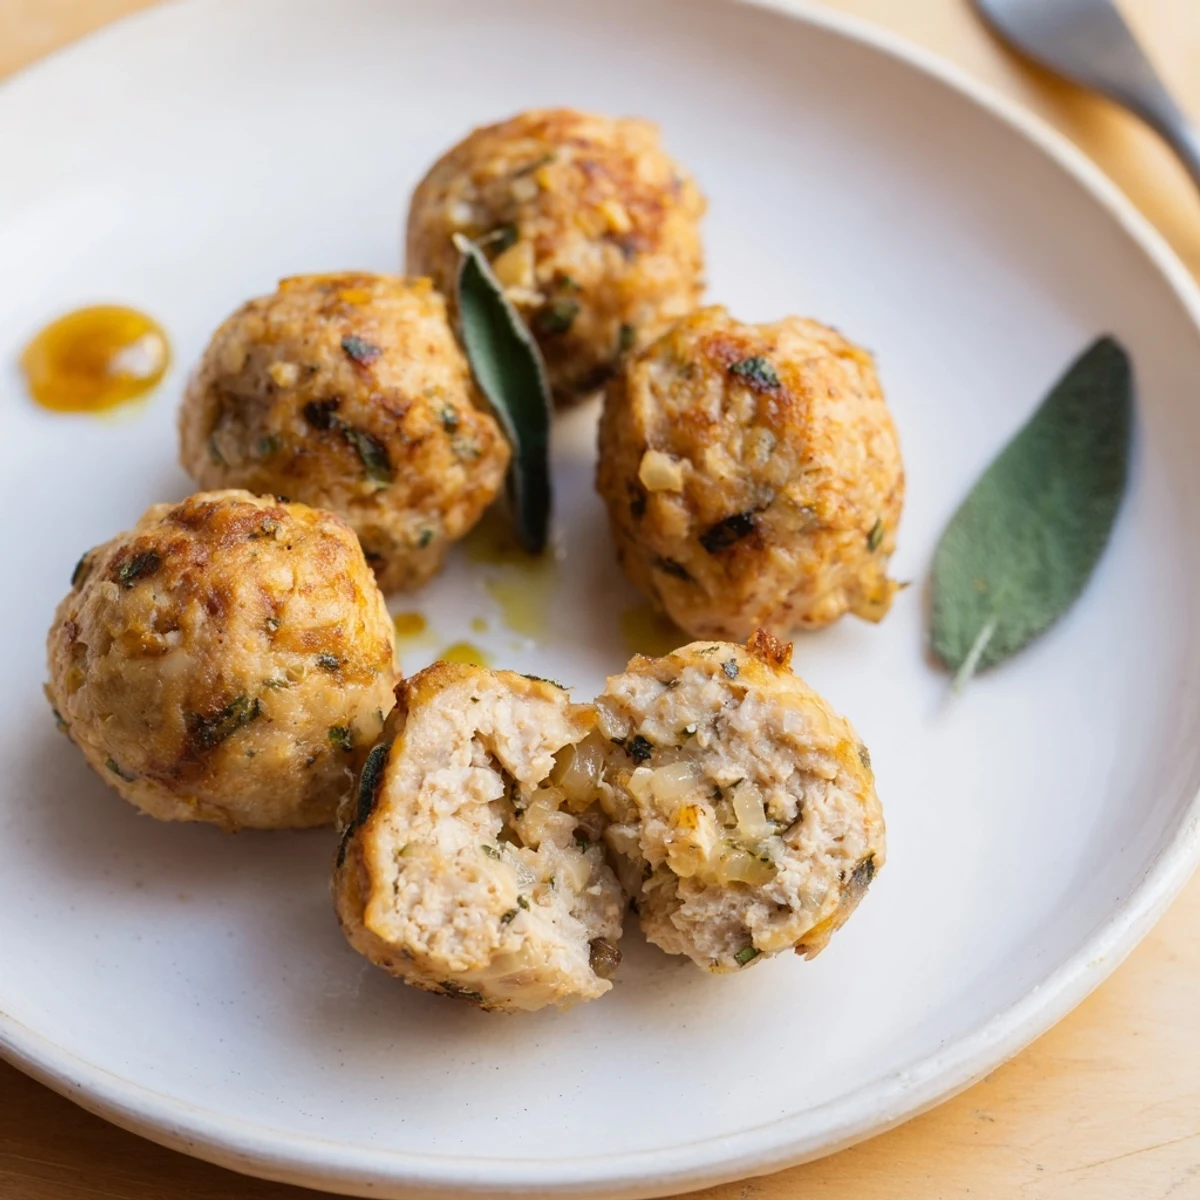
Save Juicy sage and onion chicken balls use ground thigh meat mixed with sautéed onion, garlic, chopped fresh sage, thyme, breadcrumbs and beaten egg. Shape into tablespoon portions, brush with olive oil and bake at 200°C/400°F for 20–25 minutes until internal temperature reaches 74°C/165°F.
Serve immediately with honey-mustard, cranberry sauce or inside wraps; swap gluten-free crumbs for a GF option and avoid overworking the mix to keep them tender.
The sizzle of onions in the pan always kicks things off with a sense of promise. When I first made these Sage Onion Chicken Balls, it was the earthy scent of sage blooming in the warm oil that surprised me—cozy and inviting, a little like someone gave autumn a seat at the table. This recipe came together on a rainy Wednesday evening, when dinner needed to be both hearty and unfussy. Sometimes, it’s the simplest ingredients that feel most comforting.
I once made a double batch of these for friends coming over after a long hike, and the tray was wiped clean before I even got the wine glasses out. Passing the platter around, I remember someone pausing mid-bite to ask what that herby hint was—it's sage, and it tends to get people talking. These are the moments you realize food has a knack for making afternoons linger a bit longer.
Ingredients
- Ground chicken (preferably thigh meat): Thigh meat keeps things moist—don’t be tempted to swap for breast if you want that juicy bite.
- Onion, finely diced: The trick is to sauté it just until soft and fragrant, not browned, so it melds right in.
- Garlic, minced: Raw garlic is harsh, but a quick cook with the onions makes all the difference.
- Fresh sage (or dried): Fresh sage brings a deep aroma—chop it fine and use less if swapping with dried.
- Salt: A proper seasoning ensures every bite sings.
- Black pepper: Adds gentle warmth throughout.
- Dried thyme: Subtle woodsy notes layer beneath the sage.
- Nutmeg (optional): Just a whisper, but it nudges the flavor toward cozy.
- Breadcrumbs (regular or gluten-free): These bind without making things dense—gluten-free works beautifully, just check for a neutral flavor.
- Egg, lightly beaten: Essential for binding, but mix gently or the texture gets tough.
- Olive oil: For sautéing and baking—the final brush helps that golden crust develop.
Instructions
- Prep and preheat:
- Heat your oven to 200°C (400°F) and get your tray lined or greased—it gives peace of mind when things get busy later.
- Sauté aromatics:
- Warm half the olive oil in a skillet, then add your diced onion, letting the edges go translucent with a gentle sizzle. Stir in garlic for just a minute; once fragrant, slide it off the heat and let things cool.
- Mix the base:
- In a big bowl, combine the ground chicken, cooled onion-garlic mix, sage, thyme, salt, pepper, and nutmeg if you’re using. Sink your hands in and fold until just combined—no need to knead.
- Add binders:
- Bread crumbs and egg in next; I like to use a fork to gently turn everything until it comes together, staying light-handed so the balls stay soft.
- Shape the balls:
- Lightly wet your hands, scoop up a heaping tablespoon at a time, and roll—don’t aim for perfection, just size them roughly the same so they cook evenly.
- Oil and bake:
- Arrange on your tray, then brush with the rest of the olive oil—this helps them crisp at the edges and turn golden. Bake for 20-25 minutes, flipping them halfway, until you see even browning and they feel springy.
- Serve hot:
- They’re best straight from the oven, and excellent with dips or tucked into pitas or salad bowls.
 Save
Save These chicken balls turned a chilly night into a full-bellied, laughter-filled marathon of card games with my family—nobody minded the crumbs on the table after round three. Suddenly, dinner was about more than just filling plates—it was about passing stories and seconds in equal measure.
Ways to Serve These Chicken Balls
I’ve popped these onto salad greens, tucked them in wraps with a swipe of mustard, and even served them as canapés with toothpicks. The flavor stands up to bolder condiments, but mellow enough to slip quietly into any main dish you dream up. Leftovers are rare unless you make a double batch.
Swaps and Variations You Can Try
Fresh sage is magic, but rosemary or even a bit of finely chopped parsley work in a pinch if that’s what’s in the crisper. Dried herbs give a more intense flavor, so use a bit less and taste as you go. Sometimes I add a tiny grating of hard cheese for a richer finish.
Troubleshooting for a Perfect Batch
If your mixture feels too wet, add a touch more crumbs; too dry, a drizzle of olive oil often saves the day. Resist the urge to overbake—just check for a hint of golden color and a springy texture when pressed. Little kitchen flubs can usually be solved with a bit of extra patience.
- If short on time, prepare mixture ahead and chill until ready to bake.
- A pinch of smoked paprika gives a subtle twist if you want a new flavor note.
- Don’t skip resting baked balls for a couple minutes—juices settle and they taste way better.
 Save
Save I hope these chicken balls bring warmth and chatter to your table, just as they have to mine. Here’s to small comforts and shared bites.
Recipe FAQs
- → How do I know when the balls are cooked through?
-
They should be golden and firm to the touch. Verify with an instant-read thermometer — target 74°C/165°F in the centre for safe, juicy results.
- → Can I use chicken breast instead of thigh meat?
-
Yes, but breast is leaner and can dry out. Add a tablespoon of olive oil or a little extra egg/breadcrumbs to retain moisture if using breast meat.
- → What can I use instead of regular breadcrumbs?
-
Use gluten-free breadcrumbs, crushed gluten-free crackers, ground oats, or almond meal for a lower-carb option. Adjust quantities to achieve a moist but bindable mix.
- → Is pan-frying an option instead of baking?
-
Yes. Shallow-fry in a skillet over medium heat, turning to brown each side, then finish in the oven if needed. Frying produces a crisper exterior but may require more oil.
- → How long can I store leftovers?
-
Refrigerate in an airtight container for up to 3 days. For longer storage, freeze on a tray, then transfer to a bag for up to 3 months; reheat from frozen in a low oven until piping hot.
- → How can I keep the balls tender and not dense?
-
Don’t overmix the meat—combine until just combined. Use thigh meat or add a little fat, and avoid compressing when shaping. Lightly wetting your hands helps form smooth, airy balls.